

How To Clean A Rusted Motorcycle Gas Tank
How To Remove Rust From A Motorcycle Gas Tank

Reader Disclosure
Larn more here.
Have y'all ever experienced this? The other twenty-four hours everything was running smoothly, and your motorcycle was doing exactly what you wanted it to do, but recently your motorcycle started experiencing engine sputters and stalls every now and then when you start information technology up. While you don't run across whatsoever symptoms, information technology doesn't go any ameliorate. Chances are your fuel tank is either rusting from the inside or the fuel has mixed with rust particles giving you a run for your money!
Those who believe that only vintage motorcycles that are sitting for a long time are affected by external factors are under wrong impression. It simply takes few months of negligence for corrosion to commencement forming up under your frazzle manifold, chassis, and even inside your motorcycle fuel tank!
With the passage of time and the lack of proper maintenance, oxidation is inevitable. And, while information technology is certainly non a pleasant task because the amount of time information technology usually takes, cleaning your fuel tank past yourself volition surely relieve y'all a lot of money. Only removing rust from some parts of metal surface, like your fuel tank, is non always like shooting fish in a barrel. Sure spots are hard to clean and not all methods or products bachelor in the marketplace are suitable. So, to remove rust from your motorcycle tank and forbid it from reappearing, bank check out our simple and effective tips with a handy step-by-footstep guide.
How rust forms in the tank
No unmarried tank can be manufactured from a single piece of metal. They are normally made by welding together three separate pieces; these are the bottom function, the height, and the left and right sides of the tank. Information technology is a common exercise to curl-weld the upper and lower parts together. Although, this is an economic process, simply unfortunately, also a potential crusade of corrosion.
The most significant correspondent towards the formation of rust in fuel tanks is the presence of ethanol within the fuel. Since, ethanol attracts wet, oxidation is highly likely, particularly when the motorcycle is stationary for a long fourth dimension and non moved. In fact, modern fuels contain more than ethanol than they used to.
Some other crusade of tank rust is rainwater that gets sucked in through the fuel cap. Since water is heavier than petrol, it e'er settles in the bottom of the tank which eventually causes the tank to corrode.
Furthermore, motorcycles that are stored during winters with a half-filled gas tank are more likely to get afflicted from corrosion than the ones that are completely filled to the skirt.
Step by pace guide to de-rust and seal your motorcycle tank
- Kickoff, you will need the post-obit items to showtime cleaning rust from the inside of your tank:
- An empty vessel
- A funnel with filter
- Fistful of small steel nuts
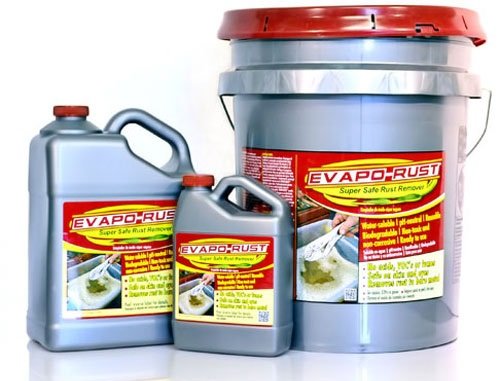
- Rust remover (for example Evapo-Rust remover)
- Dismantle and drain the tank completely. Use a strainer to dissever dirt from petrol which can be used later to rinse the tank.
- In order to clean the tank using dedicated products that are readily bachelor in the marketplace, you start need to thoroughly pre-clean the tank past throwing a handful of small steel basics along with the solvent. Once done, soak the tank for about 30 minutes before shaking it gently back and forth. The nuts here will scrape away all the loose rust while the solvent will penetrate to remove every fleck of corrosion on the metal.
iv. Depending on the amount of rust, you may need to repeat this entire procedure two-3 times before a make clean metal surface is visible from the outside.
5. Once done, bleed the mixture completely and rinse the tank with the petrol you had stored in the vessel.
vi. Blow dry if necessary.
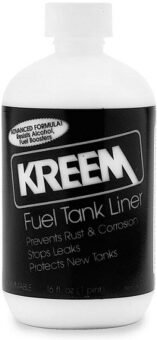
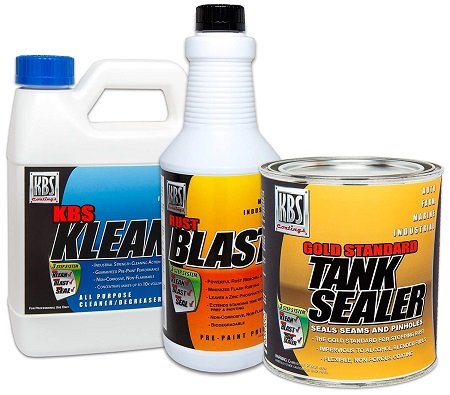
7. At this point, apply a sealant on the inside of the tank, using products like Kreem or KBS, to seal the tank permanently from corrosion. Let the production to harden thoroughly before using the tank again. Some agents take at least a week to do their task.
8. In case in that location is a visible hole in your fuel tank, y'all may demand to undertake some additional measures. This procedure requires a complete painting from the inside using constructed rubber-based sealing liquid. You may demand at least ii-3 liters to uniformly glaze the entire tank.
nine. After pouring the liquid, move the tank in all directions for around 5 minutes so that all areas are thoroughly covered with sealant.
10. Whatever excess sealant must exist drained out immediately. To avoid the formation of puddles, a vacuum suction unit tin can too be used. Subsequently, the neck and the surrounding areas of the entry indicate should exist coated using a brush.
11. Blow dry using a hot air gun.
12. Once your tank is dry out inspect using a torch light. If you take accomplished desired results, install information technology on your motorcycle again and refill it completely with petrol upwards to the skirt.
Cleaning the tank using citric acrid
Removing rust from the tank using citric acid is a relatively simple process:
- Dilute the citric acid in (preferably warm) water, and pour the mixture into the tank.
- In x liters of warm water, yous need to add approximately 300 grams of citric acid. For larger tanks, increase the quantity of water and acid in this ratio.
- Leave the mixture in the tank for 8-x hours. You lot can increase the duration depending on the level of corrosion.
- Information technology is of import to neutralize the acrid earlier draining to foreclose the tank from rusting again due to acid corrosion. To do this, add some sodium hydroxide (around half teaspoon) and stir well before draining.
- Rinse the tank several times to ensure all the residual mixture has been cleaned out.
- Once done, blow dry your tank using hot air gun to eliminate any traces of moisture and reassemble the tank dorsum in its original position.
- It is recommended to refill your tank completely with fuel to foreclose any further risk of corrosion.
Removing flash rust from the tank using vinegar
If you are dealing with wink rust or other modest corrosion, it is best to treat the tank with a mixture of vinegar and oil in a ratio of 1:one. In case you have some cooking oil at home, it is perfectly capable of doing this job. To treat, pour the mixture direct in your fuel tank and allow the mixture to soak for at least 45 minutes.
While the acetic acid in vinegar de-rusts the surface, the oil aids in loosening the contaminants and prevents new rust from forming.
For best results, information technology is advised to add handful of screws forth with the mixture and shake the tank well in a pre-defined interval. This further removes whatsoever traces of flash rust that are left backside by the mixture of vinegar and oil.
Removing rust from the tank using gravel stones
De-rusting the fuel tank with gravel stones is one of the cheapest and easiest alternatives.
Nevertheless, it is of import that the gravel stones are small-scale and abrupt-edged. Depending on the size of the tank, add together some gravel stones (we recommend a quantity of 100 grams per liter of tank volume).
To ensure that the rust particles bind, some additional fluid should be poured in. For this, you should resort to petrol, since h2o might again promote the formation of rust.
Shut the tank tightly and shake information technology thoroughly until the desired result is achieved. Depending on the level of corrosion, this action might consume an unabridged day. One time the desired result is achieved, the tank must of form be emptied and cleaned again using petrol.
De-rusting the tank with media blasting
Media-blasting is the nigh constructive and thorough, but also the about expensive method of de-rusting a motorcycle fuel tank. Several options are bachelor for media blasting, including sand diggings and walnut diggings.
In this process, a flexible tube is inserted into the tank that has a small nozzle at the terminate. Subsequently, with the help of compressed air, the diggings agent is blown into the tank. These highly accelerated blasting agents penetrate inside the rust and bring the blank metal back to the surface.
Sand blasting is the process where sand is diddled into the tank, whereas, in walnut diggings, crushed walnut shells are used. In addition, in that location is glass bead blasting, where small drinking glass beads are used in place of sand.
But one major drawback of these types of tank de-rusting techniques is that the tank must be emptied and cleaned again at the cease of the blasting process. This is peculiarly hard with motorcycle tanks because motorcycles take pocket-sized, angled tanks.
A thorough cleaning is recommended by rinsing the tank with cleaning fluids. This is all-time washed with diesel fuel, petrol, alcohol or a special tank cleaner. Likewise, y'all should use compressed air to blow dry the tank before using it again.
I of the best ways of media blasting is using dry ice, because with this method information technology is not necessary to clean the tank afterwards. In this case, the dry ice melts after blasting and and so exits the tank by itself. Still, it is recommended to thoroughly rinse the tank again after de-rusting.
Ane can rent a media diggings equipment from hardware shop or take the tank to the workshop and have information technology de-rusted at that place.
De-rust using Oxalic or Hydrochloric acid
Since medieval times, hydrochloric acid (HCl) has been known to be one of the about aggressive chemicals in the world. They are one of the most effective agents to remove rust or traces of oxidation from metal surface.
Even so, these should only be used on fuel tanks that can withstand such kind of corruption. Modernistic day motorcycle tanks are generally not moulded from a thick metal sheet and may get damaged in the process. So, proceed with caution.
An advantage of using Muriatic acid here is that rust is removed very quickly and very thoroughly. HCL is ane of the about efficient rust removers that exists, similar to phosphoric acrid. However, different phosphoric acid, 25% hydrochloric acid is readily available at whatsoever hardware shop.
In social club to clean your gas tank using HCL, we recommend pouring some diluted acid in the tank and leave it open for some time. Make certain y'all are doing this exercise in a well-ventilated open space, since the chemical reaction of muriatic acid with rust will emit harmful fumes.
For your safety, we do not recommend shaking the tank since this might create spillage or splash.
Once you find that the hissing noise / fumes have reduced, drain the acid in a container and thoroughly rinse the tank with water.
Repeat the procedure if necessary.
Notation: Do not get out the acid in your tank for more than thirty minutes at a stretch. Doing so might cause an irreparable impairment to your motorcycle tank.
Alternatives of Muriatic acid for de-rusting
Hydrochloric acid is quite popular and constructive amanuensis for de-rusting; however, it is very aggressive and can make the material of the tank more vulnerable to corrosion (metallic rusts faster if de-rusting is done manually using HCL).
Oxalic acid (click to buy), in contrast to the former, does not damage or assail the paint. It is one of the most widely used products in the automotive manufacture to chemically remove rust from tanks without damaging the surface of the tank. In fact, pocket-size concentration of oxalic acrid does not pose a problem, fifty-fifty in an immersion bath. Based on our applied experience, a concentration of x percent is sufficient, i.e., one function of oxalic acid to 9 parts of warm water, to remove rust from a moderately rusted metal tank in an hour.
Depending on the degree of rust, all the same, de-rusting may take a petty longer in this instance.
Note: All acids (including Oxalic and Hydrochloric acid) are harmful and unsafe, which is why it is important to go on them out of the reach of children and always clothing protective gloves while handling the acid.
Removing rust from the motorbike tank by electrolysis
Rusting is caused when the metal undergoes electrochemical processes. If this Redox (Oxidation reduction) reaction is reversed, information technology tin can besides be used to remove rust from ferrous parts.
Fundamentally, all oxidized metal parts can be electrolytically de-rusted. However, it is important that the workpiece must not be completely rusted through. Otherwise, it volition entirely disintegrate during electrolysis.
Things you will need
- A DC power source (battery, charger, etc.)
- Two cables
- A piece of metal (to brand anode)
- Soda (Sodium carbonate)
- A piece of plastic board / wooden lath (to hang the piece of metal we are going to make anode)
- Rinsing amanuensis / vinegar / petrol
Steps to remove rust from tank electrolytically
- Hook upwards one cable to the positive (red) and the other to the negative (blackness) terminal of the DC charger or battery.
- Now take the board and drill a hole in it. Then hang the piece of metal (your anode) on the board.
- Next, deliquesce 100 grams of soda (sodium carbonate) in warm h2o and stir for around 30 seconds.
- Now fill the tank to the brim with the mixture of soda and warm h2o you merely prepared.
- Place the tank on a non-conductive surface (wooden table, flooring, etc.).
- Immerse the piece of metal that is fastened on the wooden or plastic board inside the tank. Make sure the slice of metal is not touching the tank and is hanging in the middle. This is going to be your anode.
- Now connect the positive last (red cable) to this anode.
- Besides, connect the negative terminal (blackness cablevision) to any part of your motorcycle tank.
- Once everything is in gild, switch on the charger. Information technology is recommended to use at least 12Volts.
- Disconnect the connection and clean the anode (metallic piece) every hour and supersede it if necessary.
- Later 24 hours yous can see considerable corporeality of rust deposit around your anode.
- Echo this process for another day if required.
- Rinse and clean your tank completely using any kind of rinsing agents and lastly with petrol to get a shiny rust-free motorcycle tank!
Sealing the motorcycle tank
When information technology comes to sealing, nosotros recommend using sealing kits like Evapo-Rust, Kreem, or KBS Fuel Tank Sealer Kit which you can get from your local retailer. Typically, 250 ml will exercise for a standard tank, simply this can vary depending on the type of tank you have.
Subsequently pouring in the sealant, swing the tank effectually until the liquid covers all the areas. Drain the rest of the liquid and collect it in a container. Do non rush, as it takes almost four hours before a solid film forms.
Wait for around 15 hours before y'all apply the adjacent coat. Do not wait for more than 24 hours as the second layer needs to bind together with the outset coat.
Lastly, you volition have to let the sealer harden for one to ii weeks earlier y'all can install and utilise the tank again.
Bottom Line
Hope you establish our detailed guide on de-rusting the fuel tank insightful and helpful. Once you have treated your motorcycle tank from rust, it is highly recommended to inspect your motorcycle thoroughly for whatsoever traces of oxidation.
The best way to avoid corrosion is to launder your motorcycle regularly and lubricate all the metallic parts including the concatenation for a prolonged life.
Also run across: How to make clean motorcycle chain
For more details and information, feel free to write the states dorsum. Happy cleaning 🙂
Source: https://wildtriumph.com/how-to-remove-rust-from-a-motorcycle-gas-tank/
0 Response to "How To Clean A Rusted Motorcycle Gas Tank"
Post a Comment